 |

 | | | | | |
|
| |
Step 1: Organize your thoughts.
We’ll assume you’ve already done that. |
|
| | | |
|
|
Note: if you use the script we’ll present at the end of this tutorial, you don’t need to do Step 2. The script automatically saves the images in a uniquely-named temporary folder in your Documents folder.
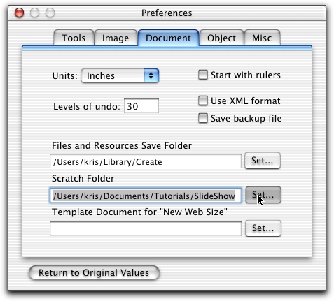
Step 2: Change the location of your scratch folder in Preferences (Create->Preferences.
We’re going to be creating a lot of images using drag and drop. Create puts these in a scratch folder (normally /tmp/Create-yourusername). Since we want to keep these images around, we’ll change the scratch directory to a folder in our home directory. |
|
|